Paste a list of addresses
By Nathan ColeUpdated
The paste wizard turns a plain list of addresses, one per line, into a complete plan. It geocodes every line, lets you fix the lines it cannot locate, and creates the orders, one depot, and your vehicles in six steps. Use it when the input is addresses only. Loads and time windows need a spreadsheet import, which keeps them.
Step 1: Paste your addresses
On the Home page, press Paste address list. Paste your addresses into the box, one per line. The wizard requires at least two.
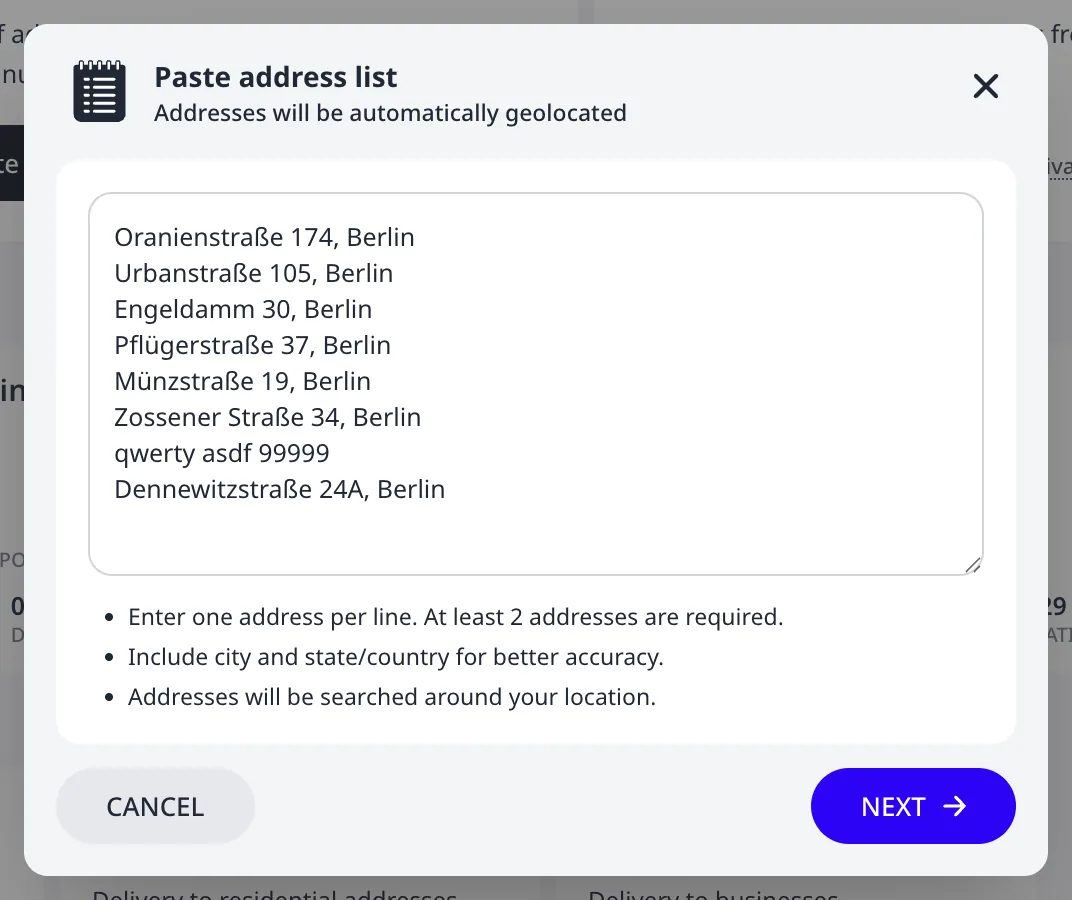
Geocoding accuracy depends on how each line is written:
- One address per line, nothing else on the line.
- Include city and state or country for better accuracy.
- Routing24 searches for each address around your current map location, so far-away addresses need the extra context most.
Press Next and Routing24 geocodes every line.
Step 2: Fix lines that could not be located
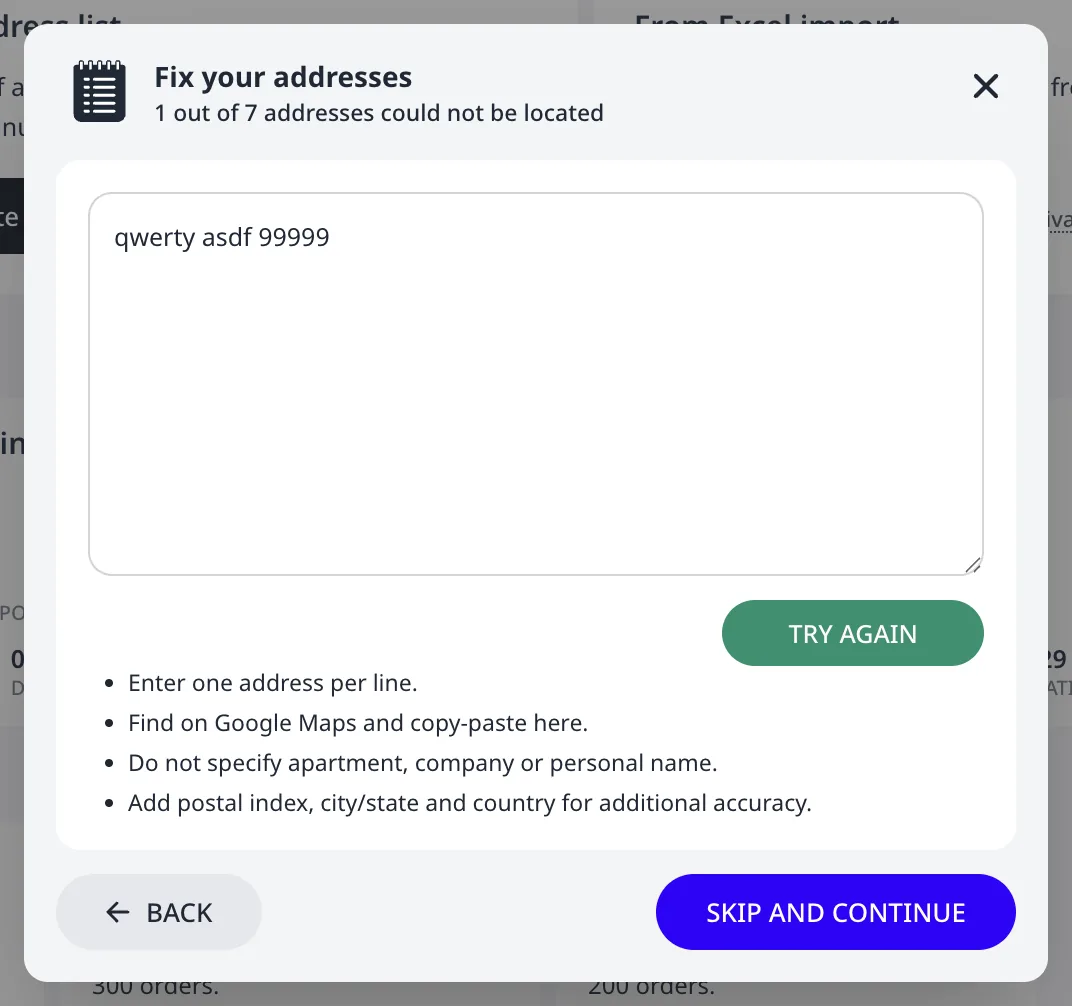
When every line resolves, the wizard skips this step. Otherwise a Fix your addresses step lists only the failed lines, with a count like "2 out of 15 addresses could not be located". Edit the lines in place and press Try again. A failed line can be retried any number of times. The on-screen tips:
- Do not include apartment numbers, company names, or personal names.
- Add a postal code, city or state, and country.
- Find the address on Google Maps™ and copy it from there.
Skip and continue proceeds without the unresolved lines. They can be fixed later: see Fix unrecognized or mislocated addresses.
Step 3: Choose your home address
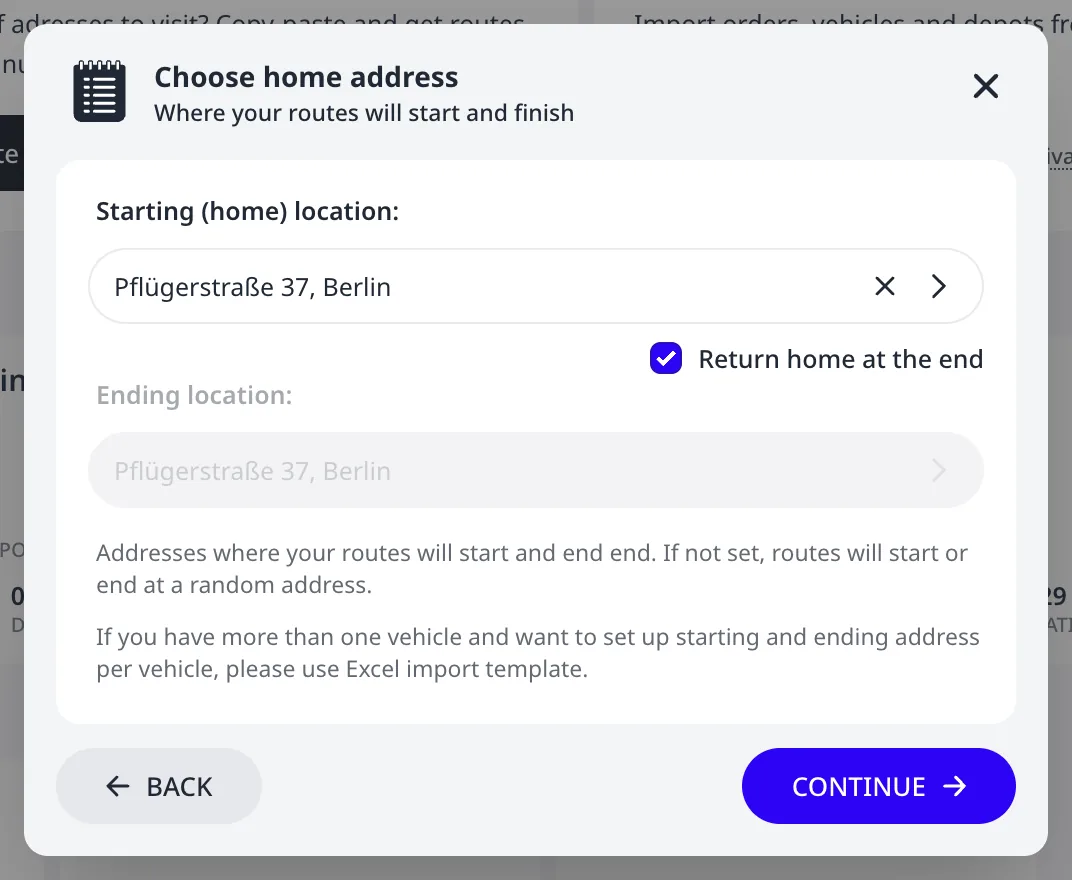
Pick your Starting (home) location from the addresses you pasted: the place routes leave from. Leave Return home at the end checked for round trips, or untick it and choose a separate Ending location (or none, for open-ended routes).
This step creates the depot. One start and end applies to all vehicles here. For per-vehicle depots, use the Excel template instead.
Step 4: Vehicles and working hours
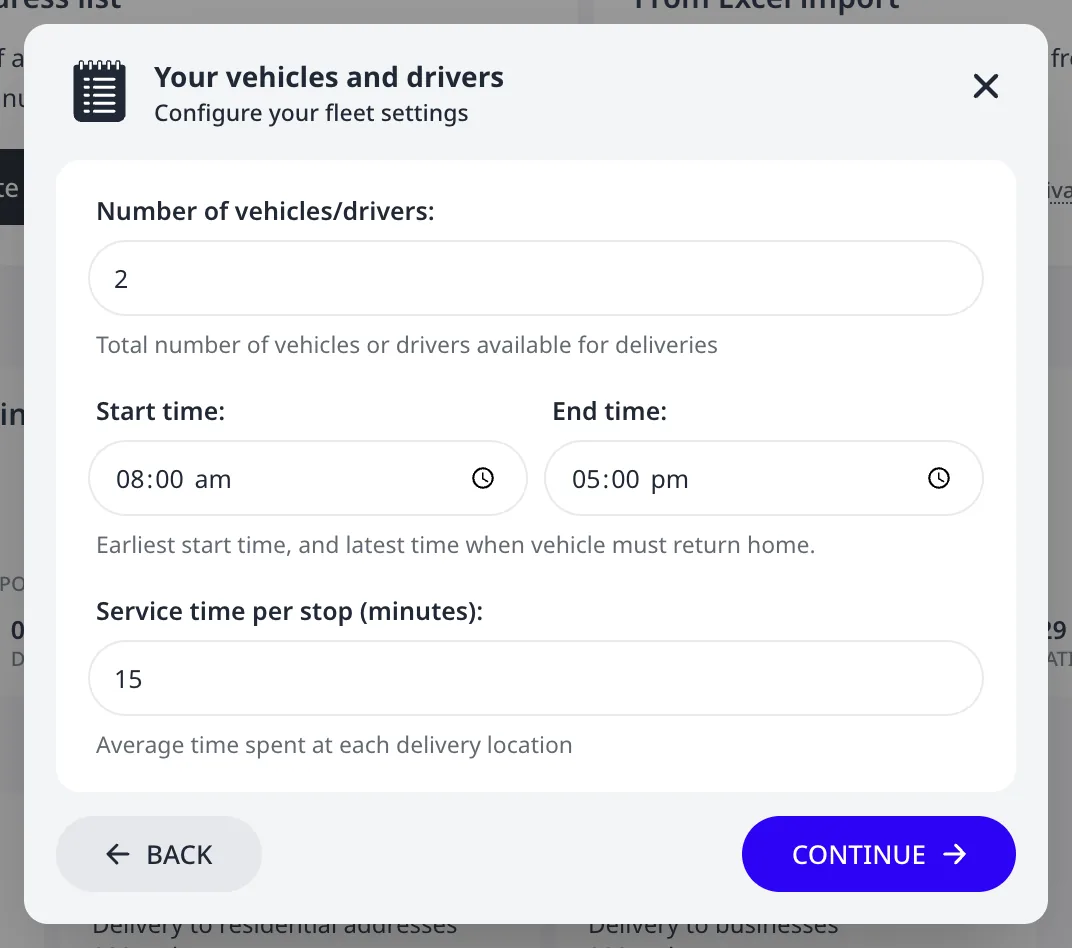
Three fields describe the fleet:
- Number of vehicles/drivers available for the day.
- Start time and End time: the earliest a vehicle may leave and the latest it must return.
- Service time per stop (minutes): the average time spent at each address. This single default applies to every order: ten orders at 10 minutes each is over an hour and a half of the working day.
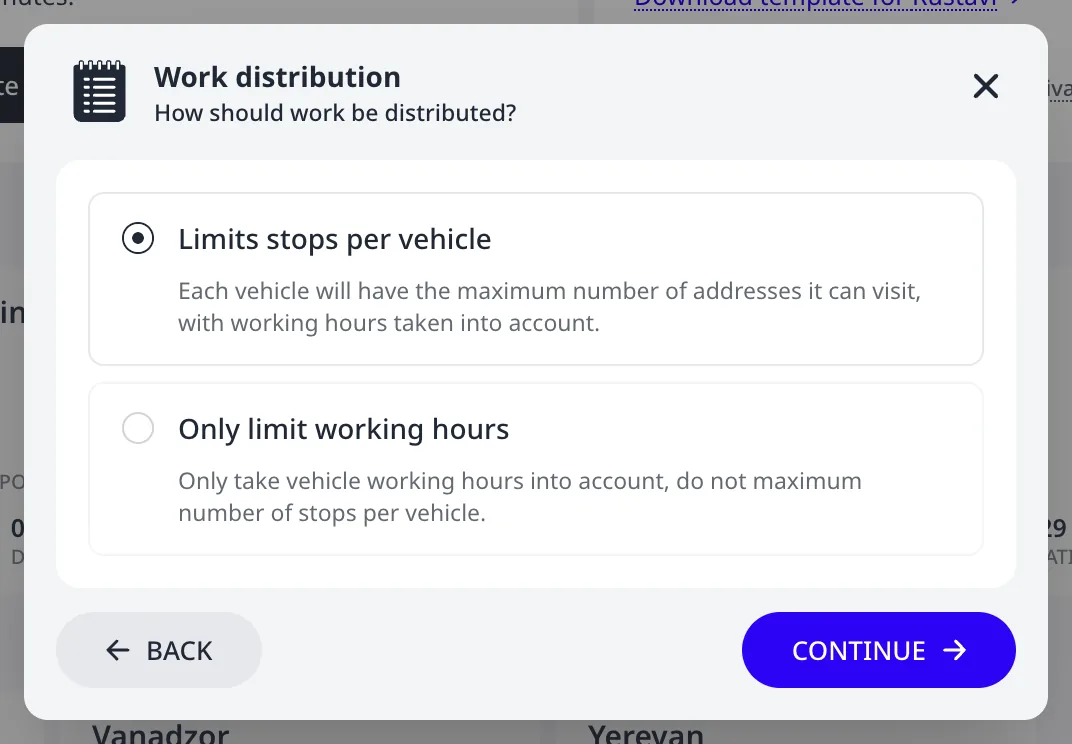
Step 5: Work distribution
With more than one vehicle, the wizard asks how to split the work:
- Limits stops per vehicle caps how many addresses each vehicle visits, spreading the work evenly while still respecting working hours.
- Only limit working hours lets the optimizer use as few vehicles as the hours allow, which usually means cheaper routes but an uneven split.
With a single vehicle, the wizard skips this step.
Step 6: Summary
The final screen summarizes what the wizard will create: the address count, vehicles, depot, working hours, service time, and the distribution choice. From here:
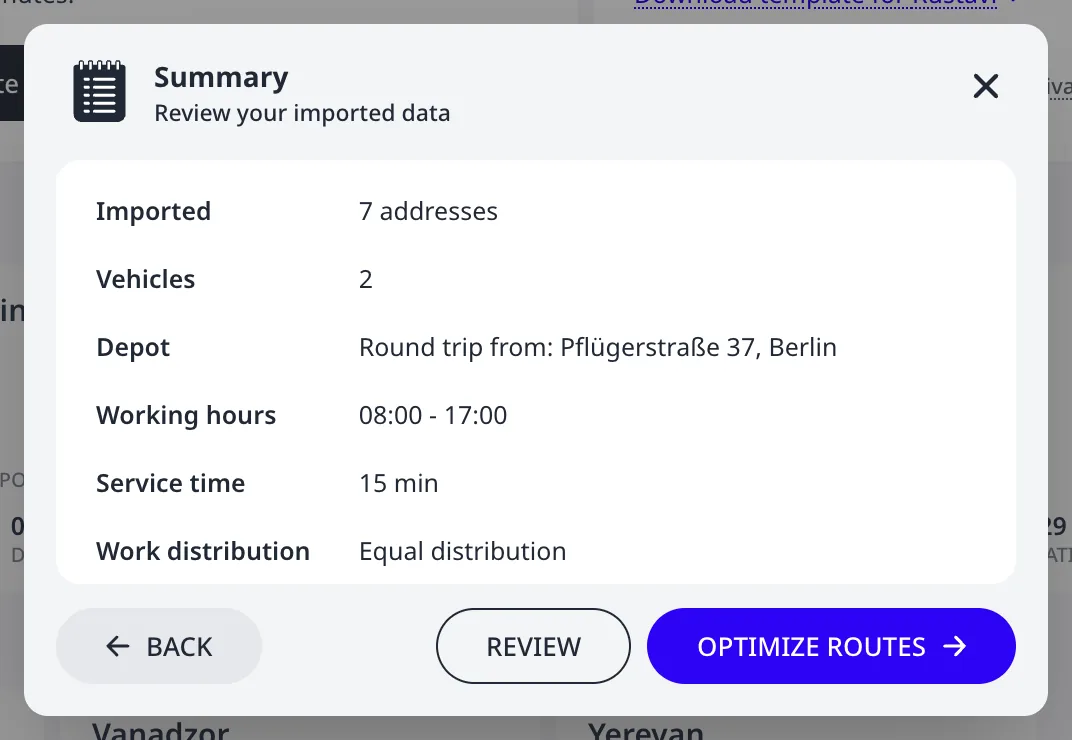
- Optimize routes builds the plan and starts the optimization.
- Review builds the plan and opens the Orders page first, where you can adjust details, like a bigger service time for one order, before running it.
The wizard creates a normal plan: orders, a depot, and vehicles, editable like any other. Time windows, service time, priority, and load covers the per-order details.
Next step
Plan your first route in 5 minutes walks the same flow end to end with a ready-made example.
FAQ
How many addresses does the wizard need?
The wizard needs at least two lines. Every line is geocoded when you press Next, so a long list takes longer at that step. Keep one address per line with nothing else on the line. For lists with loads, time windows, or several depots, import a spreadsheet instead, because the wizard reads addresses only.
What happens to addresses the wizard cannot locate?
The wizard stops at a Fix your addresses step that lists only the failed lines, with a count such as 2 out of 15. Edit a line in place and press Try again, as often as needed. Skip and continue proceeds without the unresolved lines. Those addresses can still be fixed later in the plan, on the Address Book page.
Can the wizard create more than one depot?
No. The Choose your home address step creates one depot from the pasted addresses. Every vehicle starts there. Leave Return home at the end checked for round trips, or clear it and pick a separate ending location. For a different start or end depot per vehicle, import the fleet from the Excel template instead.
Does the wizard set a service time for each stop?
Yes, one default for all of them. Service time per stop in the vehicles step is the average number of minutes a driver spends at each address. The optimizer adds it to every stop, so 15 stops at 10 minutes take 2.5 hours of the working day. Change individual orders later on the Orders page.