Plan your first route in 5 minutes
By Nathan ColeUpdated
This walkthrough uses a small ready-made plan: a bakery van delivering to eight cafés in Berlin, Germany. It needs no account and no data to download.
Every step in this guide works with your own data. You can set up real addresses instead. What is Routing24? is an overview of what the app does.
Step 1: Start with your orders
Navigate to the app. The Home page provides four options to start a plan:
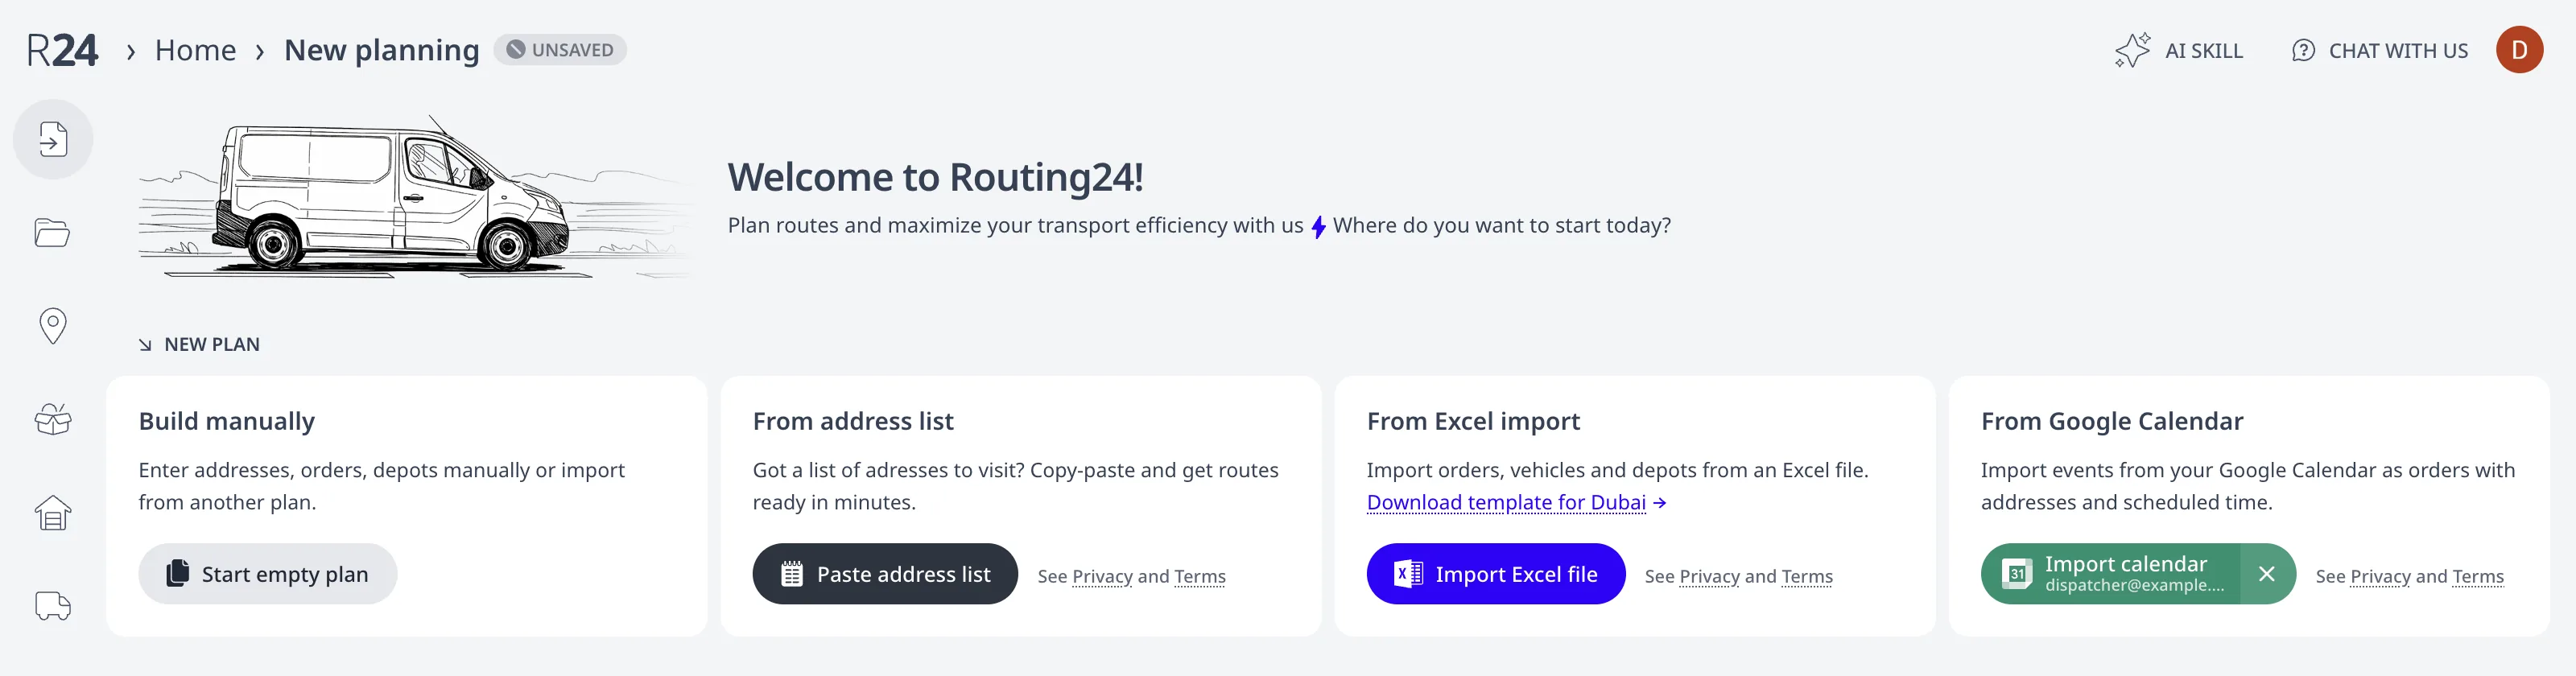
- Start empty plan to add orders one at a time by address.
- Paste address list for batch geocoding and validation, one address per line. Paste a list of addresses describes the wizard step by step.
- Import Excel file to set any supported constraint and rule from one structured spreadsheet file.
- Import calendar to import Google Calendar™ events as orders.
For this tutorial, press OPEN IN APP on the example card above. It imports the tutorial data and shows import stats.
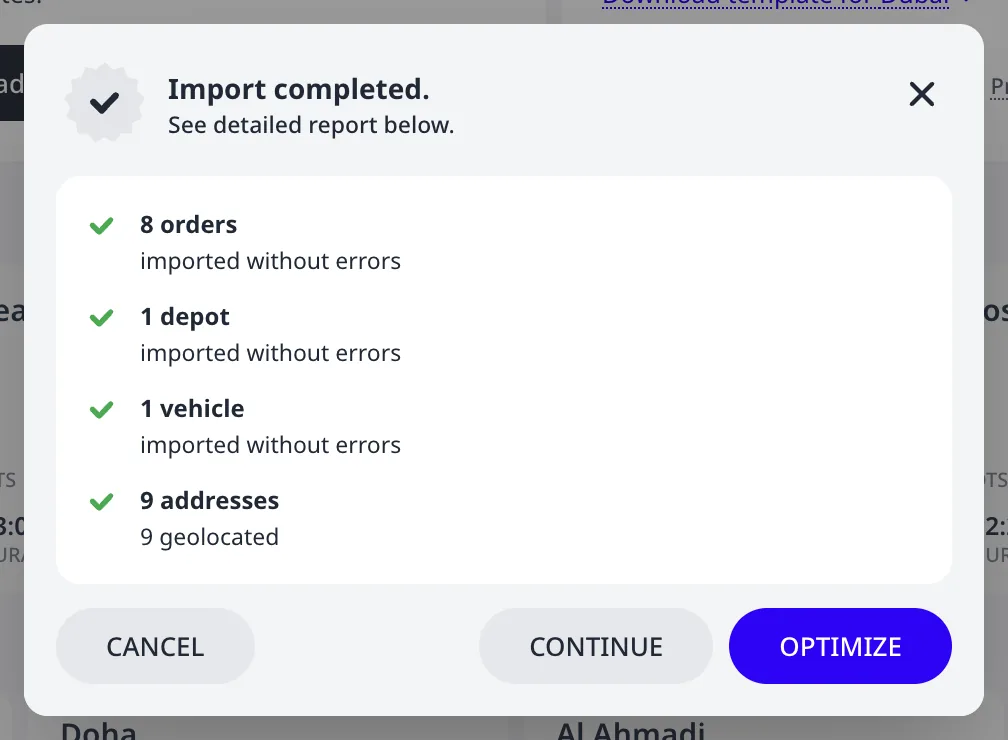
Every manual import ends on this review dialog. It reports what the import found, what it skipped, and whether every address resolved to a location on the map.
Press Continue to accept the import and review the data by hand, or Optimize to start route optimization at once. The steps below follow Continue.
Step 2: Review the orders
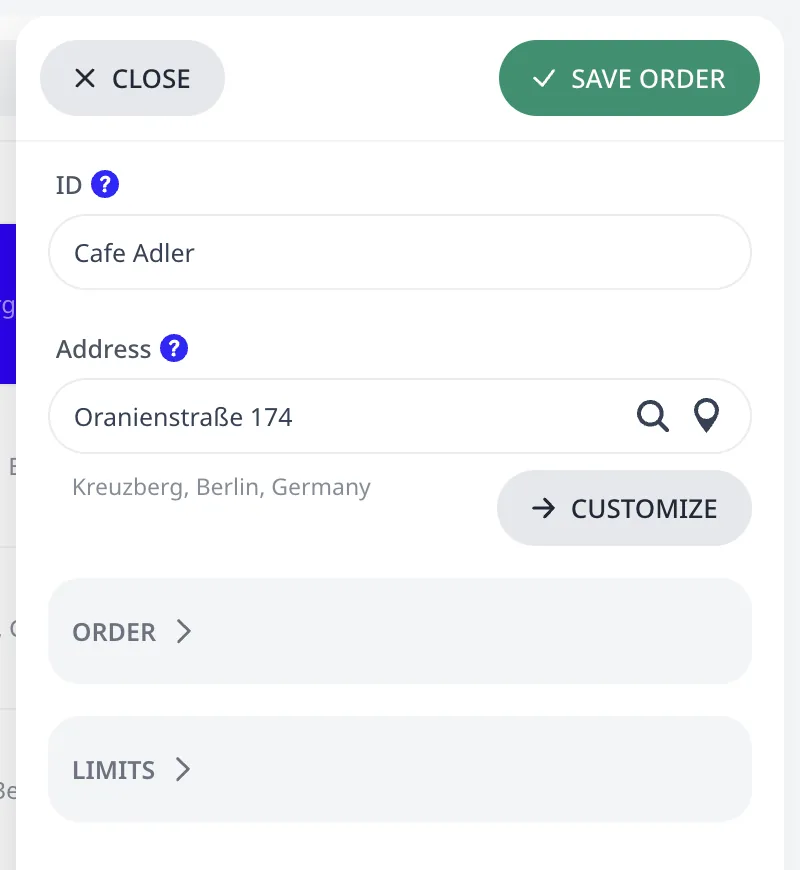
Open Orders from the left menu (see screenshot below). Each row is one order: an ID, an address, and its rules. Each café has a delivery load, loaded at the depot, and a five-minute Service time per delivery. The map shows every order as a clickable pin.
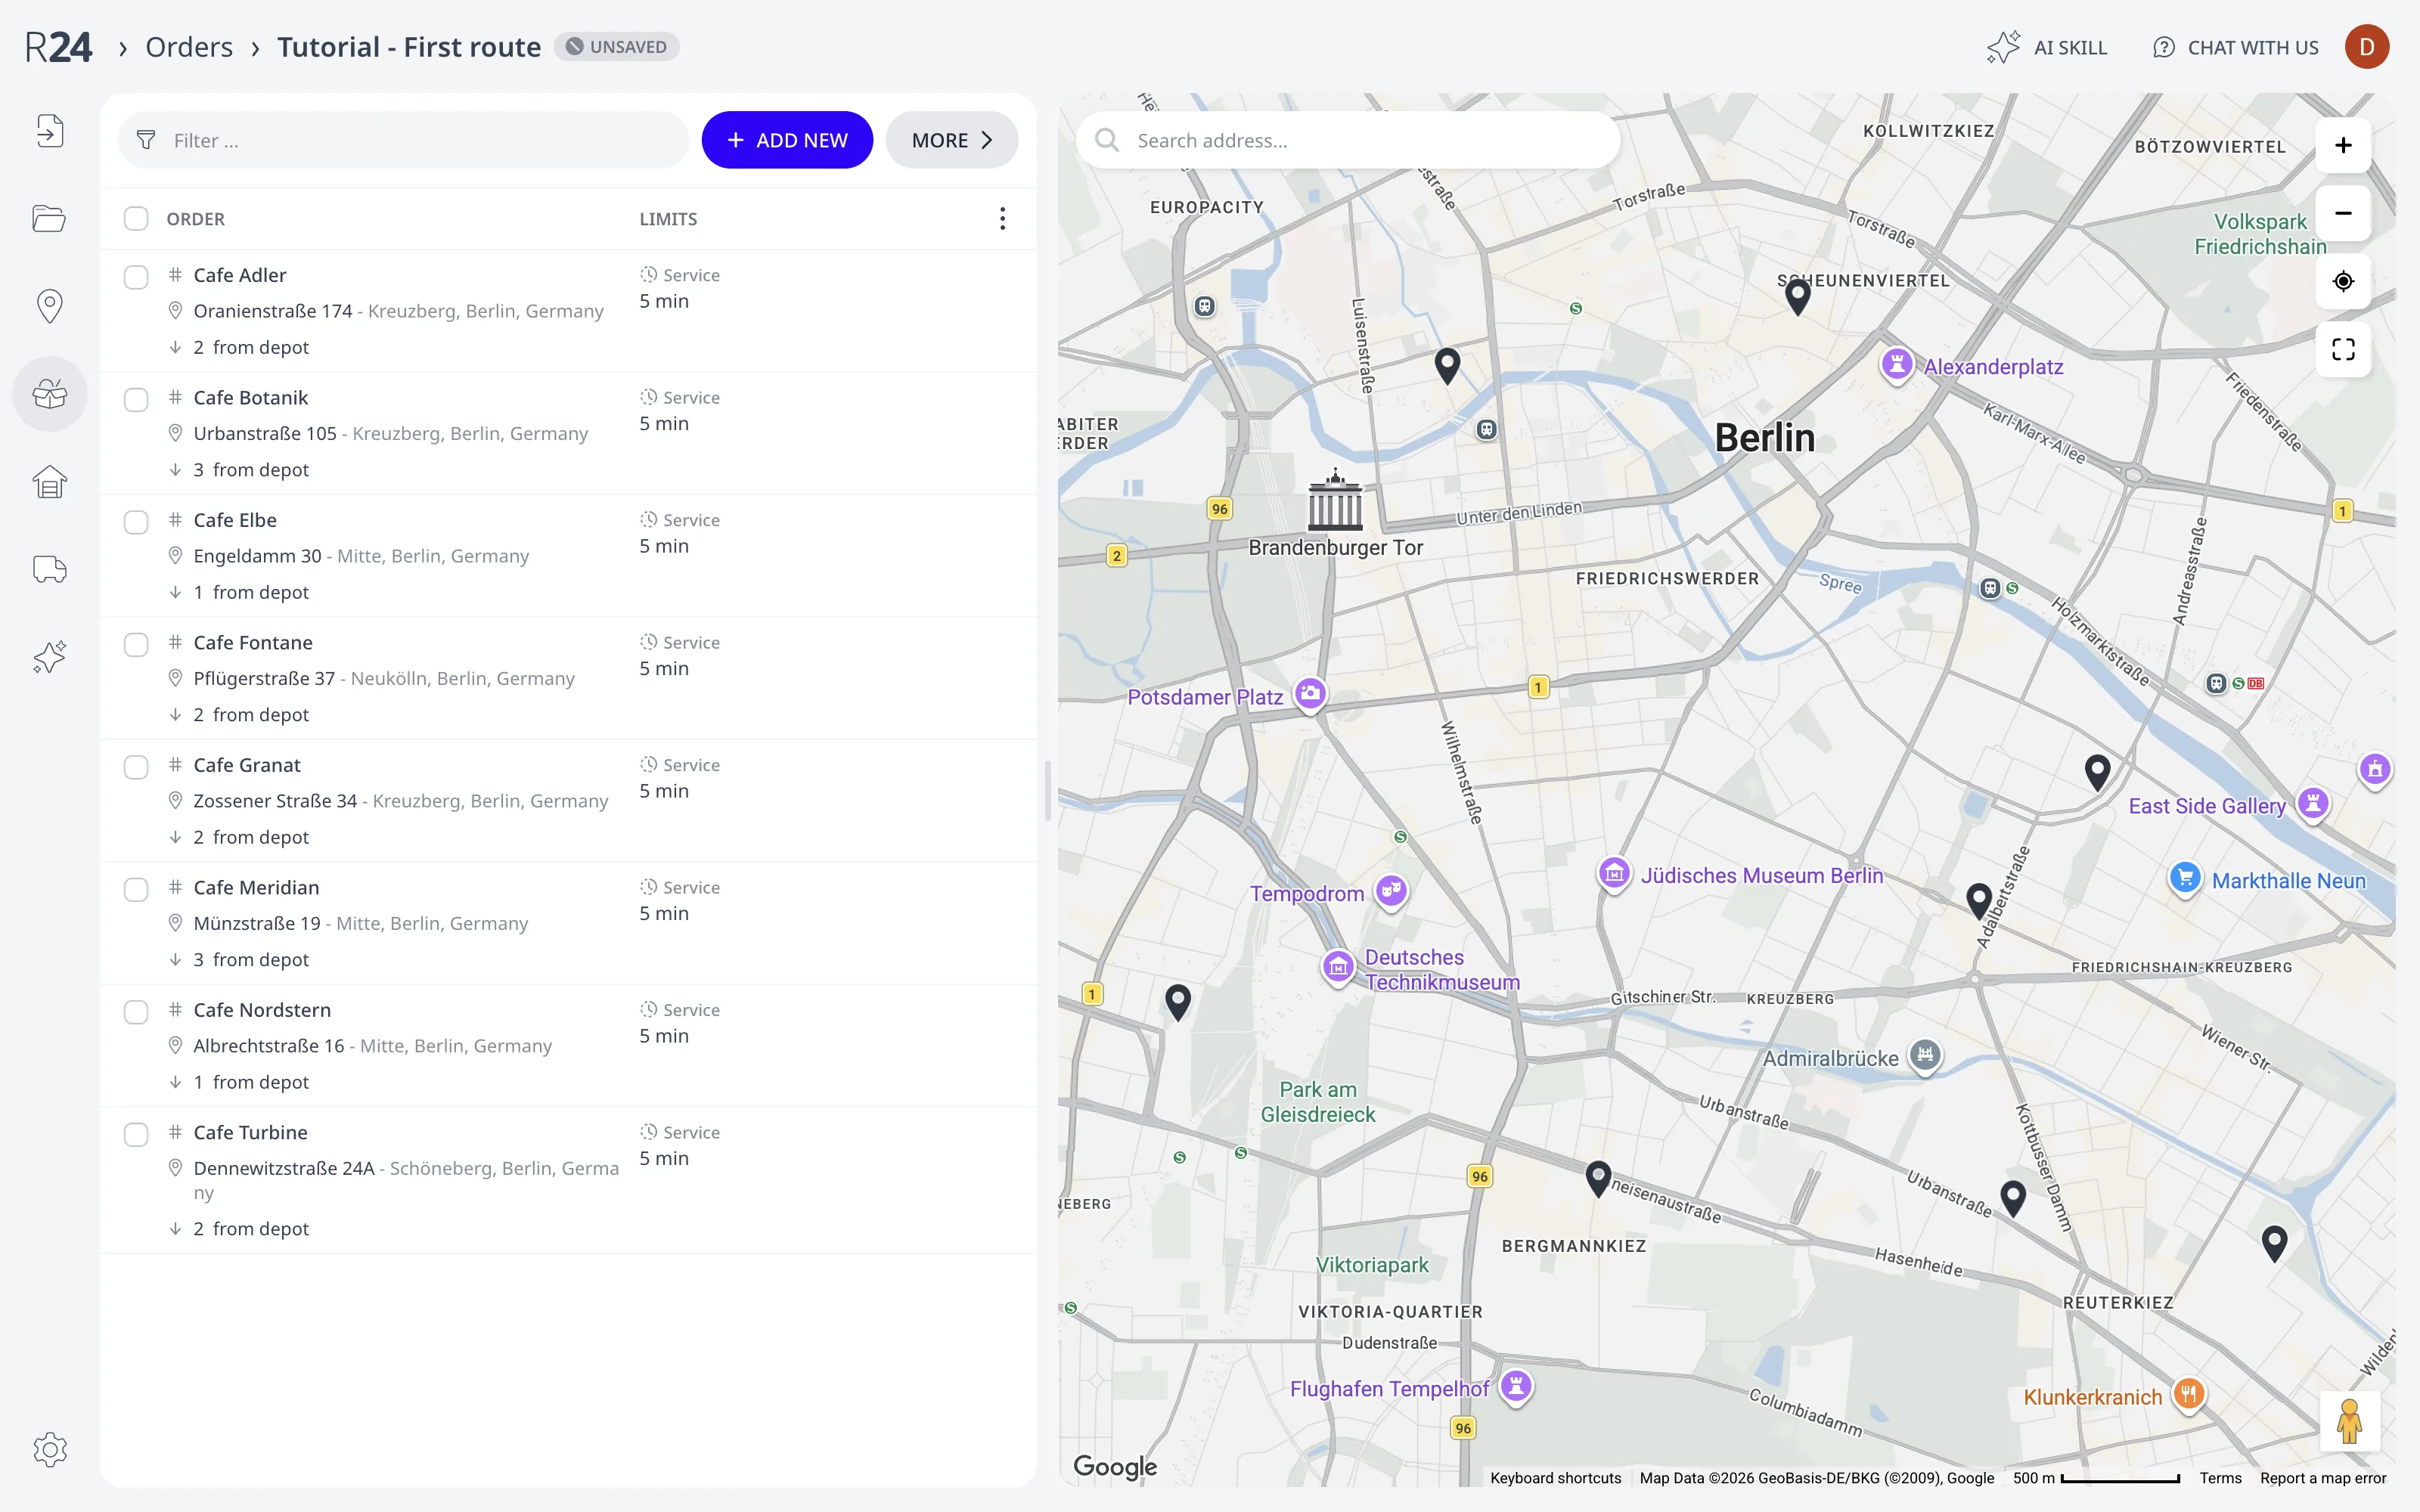
Click any address in the list. You will see the order selected in the list and on the map at the same time.
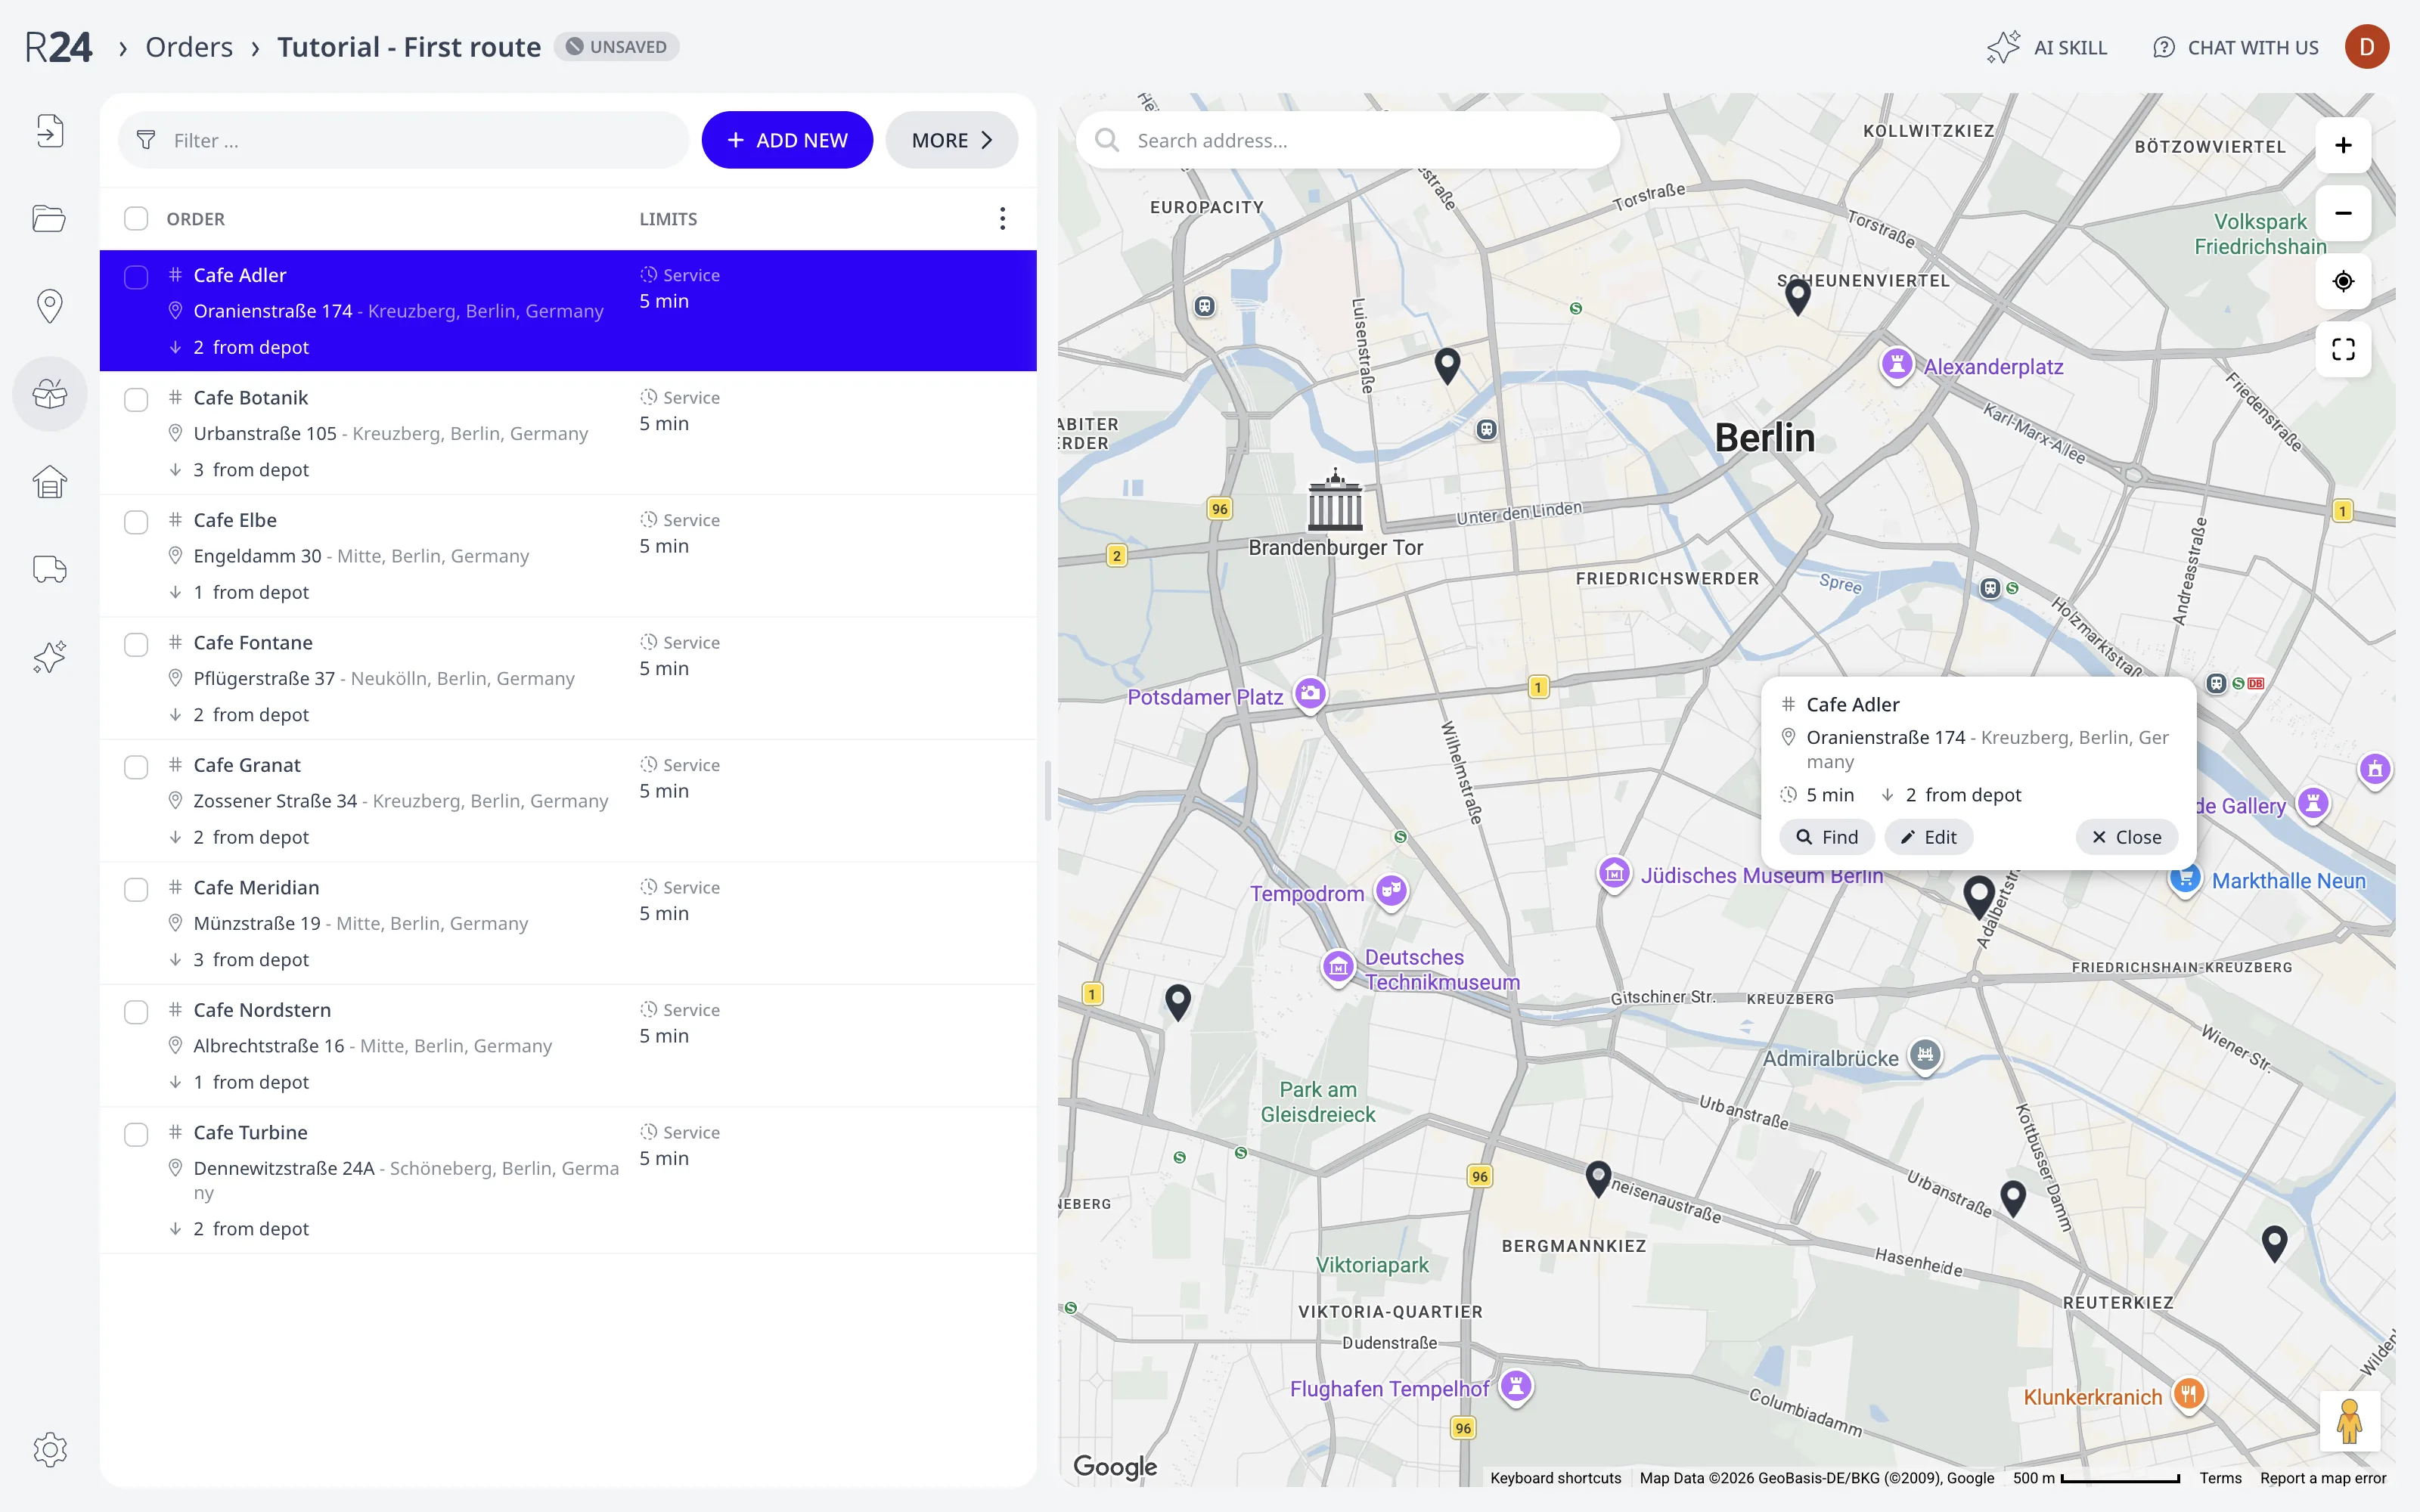
Press Edit to change an order, or + Add new to create one.

Addresses alone are enough to build a route. You can add other order properties, such as load quantity and time windows, later.
Step 3: Check the fleet
Open Fleet. The example has one van: capacity of 20, a shift from 08:00 to 16:00, and costs set on the vehicle. The Depots page lists the bakery, the address the van leaves from and returns to. Add vehicles and depots describes every field of both editors.

The optimizer plans each route as a round trip that starts and ends at the depot. A vehicle that needs additional load mid-route can reload at the depot and continue with more deliveries. Set the depot to the address your drivers leave from. The optimizer minimizes every route's distance from there.
Step 4: Optimize
Open the Optimize page from the left menu and press the Optimize button. The optimization runs for several seconds. You will see the optimization progress in the TIME LEFT counter.
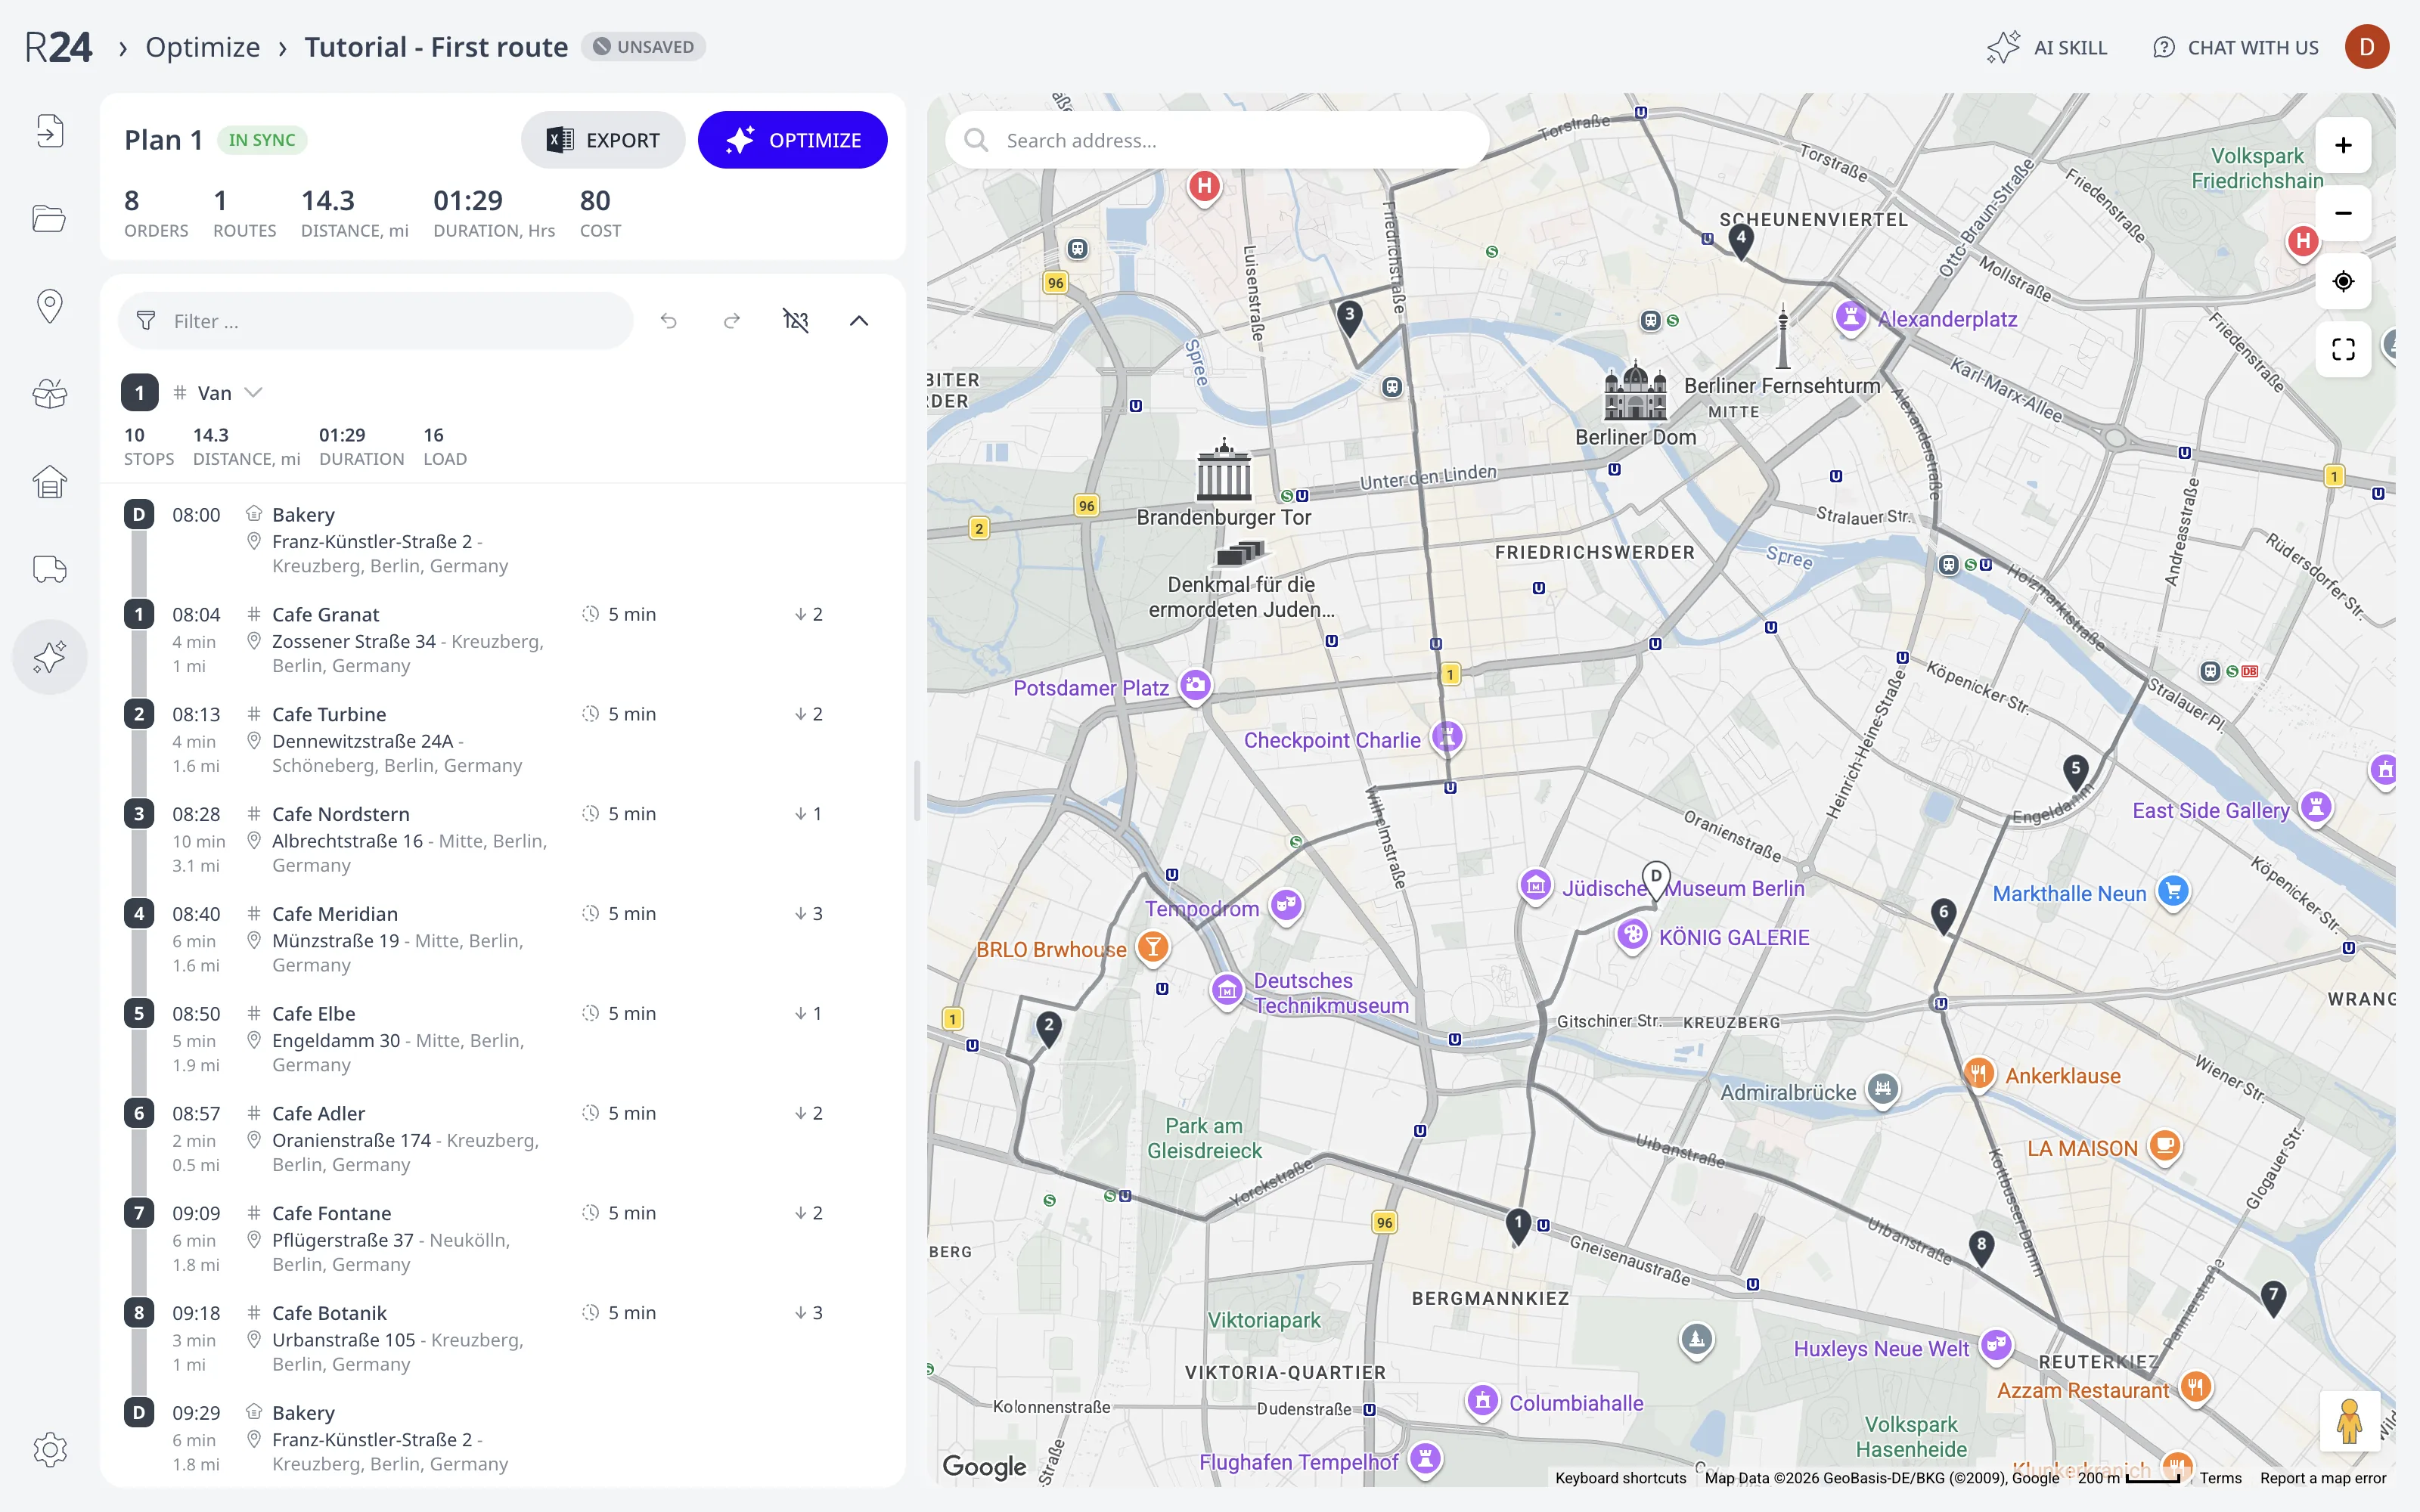
The optimization result appears at three levels:
- The header strip totals the plan: orders, routes, distance, duration, and cost.
- Each route card shows its vehicle with per-route stats: stops, distance, duration, and load.
- Each stop row has an ETA, the travel time and distance from the previous stop, the service time, and the load it delivers.
The map renders the route in visiting order, starting at the depot, running through every stop, and returning to the depot.
Step 5: Adjust and re-run
You can still edit route sequences after optimizing:
- Drag a stop to another position in the same route or to another route. Drop it on Drop here to unassign to remove it from the routes.
- An order that cannot be served appears in a red Unassigned section. The section lists the reason for the failure and a suggestion for where the order would fit best.
- Undo and Redo reverse and reapply recent edits.
- Press Optimize again. This starts optimization from scratch. Any manual changes you made are lost.
For the complete list of manual editing operations, see Edit routes by hand.
Step 6: Export or share
- Export (next to Optimize) downloads the whole plan as an Excel workbook: ordered stops with ETAs, per-route stats, and Google Maps™ links per stop. Available on every tier.
- Share route (on each route card) generates a unique link that opens the driver's mobile view with step-by-step route navigation. Route sharing is part of the Starter plan. The free tier allows a limited number of shares.
Routing24 saves plans automatically as you work. This example plan saves in your browser until you sign in, then it transfers to your account. See Accounts, saving, and sharing.
Next step
Work through the standard sequence: import orders, review data, run the optimizer, adjust routes, and dispatch. Then add your operational rules: time windows and service times so ETAs match reality, vehicle capacity and per-order load so routes stay within capacity, and shifts so routes fit a real working day. Start with Time windows, service time, priority, and load and Vehicles & Constraints.
FAQ
Do I need an account to plan my first route?
No. The walkthrough uses a ready-made example plan, a bakery van delivering to eight cafés in Berlin, and needs no account and no data to download. Press OPEN IN APP on the example card, review the import, and optimize. Optimizations of example plans do not count against the no-account limit.
What is the minimum data a route needs?
Addresses alone are enough to build a route. The example ships eight orders, one depot, and one van with a capacity, a shift, and costs. Other order properties, such as load quantity and time windows, can be added later. Every manual import ends on a review dialog reporting what it found.
How do I start a plan from my own data?
The Home page provides four options: start an empty plan and add orders by address, paste an address list one address per line, import an Excel file with any supported constraint, or import Google Calendar™ events as orders. Every step of the walkthrough works the same with real addresses.
What do I get after pressing Optimize?
The result appears at three levels: the header strip totals the plan with orders, routes, distance, duration, and cost; each route card shows per-route stats; and each stop row has an ETA, the travel from the previous stop, the service time, and the load. The map renders the route in visiting order.
How do I get the finished route to a driver?
Export downloads the whole plan as an Excel workbook with ordered stops, ETAs, per-route stats, and Google Maps™ links per stop, on every tier. Share route on each route card generates a link that opens the driver's mobile view; sharing is part of the Starter plan, with limited shares on the free tier.